
Building Your Own DIY Portable Outdoor Movie Screen with PVC to be Used Time & Time Again
You’ve got a projector, you’ve got a few DVDs and movies, you’ve set the chairs up, arranged popcorn, set the date, and sent the invites out to your friends and family, but there’s one ingredient missing – and probably the most important part too!
The outdoor movie screen.
I’ve personally shown hundreds of outdoor movies in my backyard since 2007, and when I first started out would use basic materials to project the movie images onto.
My first ever backyard movie was a complete disaster. I tried to project the film onto a wall at the rear of the yard, but it failed for a couple of reasons.
Firstly, the color and shade of the wall meant that the movie couldn’t really be picked up visibly, despite me changing contrasts and colors on the projector.
Not only that, it simply wasn’t high enough for people to see the movie properly.
It was a rubbish movie night!
I could have white-washed the wall, but that’s kind of permanent thing, and my wife wasn’t overly keen – plus it still wouldn’t have solved the height issue.
So, I came up with a solution that involved building my own DIY outdoor movie screen which has served me really well on hundreds of occasions since.
In the past, I have either hung the screen or used feet and tethered the frame to the ground. I am going to go through both ways in which you can set yours up, but before doing that you will need to build the screen and frame first.
I will show you in a stepped procedure what you need, and what you do, including some links to where you can buy the right equipment cheaply online.
I hope you find these guides useful, and if you find other methods on how to build an outdoor movie screen that you think I should also publish, then I would love to hear from you!
Outdoor Movie Screen: Materials & Tools Needed
- Carl’s Blackout Cloth
- Stitch Witchery Tape (or a sewing machine)
- Retractable Knife (or scissors)
- 1.5 Inch PVC Piping
- 1 Inch PVC Connectors:
- PVC Elbows (pack of 4)
- PVC Couplings
- PVC Pipe Tees
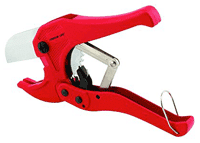
- PVC Pipe Cutter (or hacksaw)
- Screws
- Paracord (or twine)
- Tent Stakes (or tent pegs)
- Mallet
How to Make an Outdoor Movie Projector Screen – Instructions
The method I am just about to show you will give you a large, affordable, and collapsible DIY movie projector screen that you can use time and time again.
It will be made from PVC and special material, and it will be possible to either hang it or set it on fee as an outdoor freestanding projector screen that will hold steady in windy areas.
You will end up with an amazing portable screen, that offers a really good picture, and will be perfect for outdoor movie nights.
How to Make an Outdoor Movie Screen with PVC
Step 1: Create Your Screen
Now before you start, you might consider using a bed sheet for your screen. That will work, but I would always advise that you use a good quality screen material instead that you can purchase from Amazon.
That product is called Carl’s 16 x 9 white blackout cloth (check prices on Amazon.com).
You can use a bed sheet or cloth, and my method below will let you do so, but by using something more built for the purpose which is designed for projector screens you will get far better results. Buying Carl’s blackout cloth product will mean you will get a far better picture, and have something that you can use over and over again.
Please note: If you don’t want to build your own outdoor movie screen from scratch, then Carl’s also sell an all-in-one product which also comes with the frame and standings. You can view that here on Amazon – it’s very cheap, and easy to assemble.
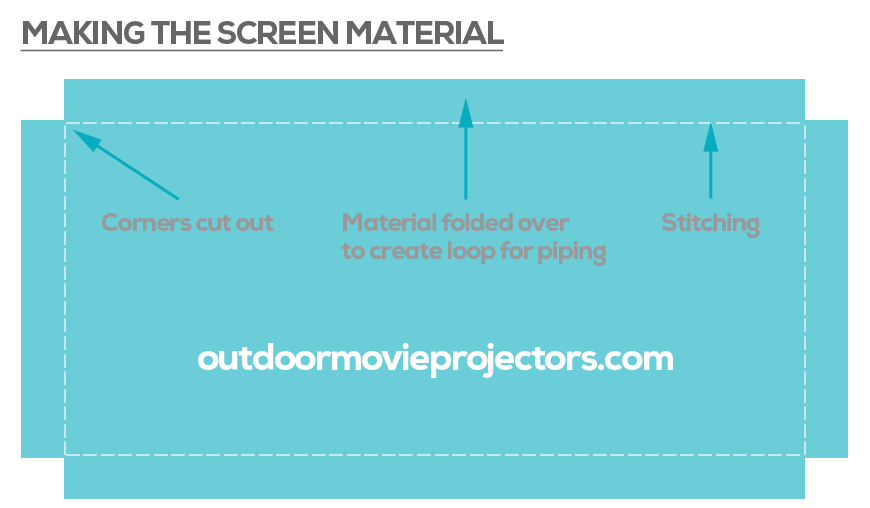
Lay the cloth screen on the floor, scratchy side up, which is the back.
Don’t Make This Rookie Mistake: When attaching your screen material, make sure that you put the side that’s meant to be projected on at the front. For example, if using the Carl’s Blackout cloth for a DIY projector screen, you need to make sure that the scratchy side is the back of the screen, not the front! You can hear the difference by scratching your nails over the material. Scratchy side is the back!
Fold over each side about 3 to 4 inches (about 8 to 10cm) – what you are doing here is making the pockets for the PVC pipe and frame to feed into.
Once you have folded over the cloth, you will need to either fix the fold using an adhesive iron-on solution or sew it. Sewing is my preferred method, but I appreciate many of you won’t have access to a sewing machine.
The iron-on adhesive I have used in the past is called Stitch Witchery – you can buy it on Amazon very cheaply.
Using the Stitch Witchery product will work, but it’s a pain in the backside trying to use. You will have to lay the cloth down the floor, put the Stitch Witchery tape between the fabric, put a towel under it so you don’t melt your carpet, put a damp cloth over it, and then iron over each section for about 10 seconds each time.
If you can get someone with a sewing machine, then do that instead as it will be much faster.
I didn’t notice any real difference in durability, only that using a sewing machine will make your job a lot quicker!
Once you have completed sewing or fixing the foldovers in place, you will then need to cut a square out of each of the four corners of your material. This is where you will be pushing your PVC pipes through.
You will now have your own DIY outdoor movie screen at a 16:9 ratio which should look something like this:
Step 2: Build the PVC Frame
Next up lay the entire screen material flat, and take the measurements using a tape measure. Be sure to take multiple measurements as when you created the fold-over pockets there could be a little variance.
For the example above the measurements were 102 inches wide, and 58 inches high.
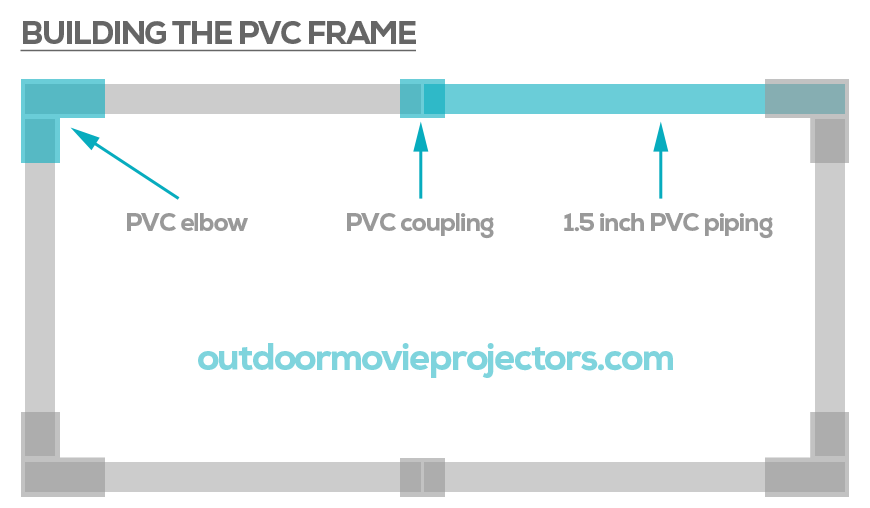
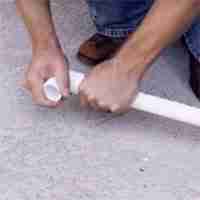
You will now need to build the PVC frame. Now for this, I recommend that you use 1.5 inch PVC piping (buy on Amazon). You will need to cut it, and a hacksaw will work, but it’s hard work and will leave rough edges that you will need to sand down.
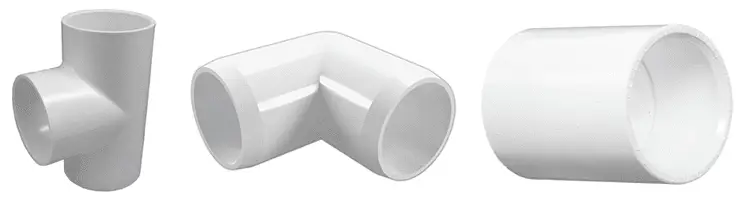 PVC connectors, including tees, elbows, and couplings in addition to the actual piping you will also need.
You will need to cut 6 pieces of pipe.
 When cutting the pipe, always go longer than you estimate, as you can always cut down further to size if you have made any errors.
If possible use a PVC pipe cutter rather than a hacksaw – I like the Armour Line brand, but there are plenty of different brands available on Amazon. A good PVC pipe cutter is quick to use and will leave a nice clean cut.
For the top and bottom bars you should use 2 pieces of pipe (making 4 in total) – this will make the screen a lot more portable and easier to break down into smaller pieces for storage.
For the sidebars, you will only have 1 pipe on either side (making 2 in total).
Once you have your 6 pieces cut, lay them out over the screen to make sure everything fits together using the PVC elbows and couplings. It should look something like this:
If your frame is too large, that’s ok, because we want to cut them down further, almost until they don’t fit as it’s the tension that is going to pull the screen over the frame to give you a nice flat surface to project onto.
 Stretch it tight over to get rid of any wrinkles or creases. Keep adjusting and pulling the material over until you get it to fit nice and tight.
Once you have pulled everything tight, made any additional cuttings off the frame, and then fitted it all together you should have your own DIY outdoor movie screen that you have built yourself – and hopefully in just a couple of hours.
It’s portable as it can be taken apart and put together at any point – pretty cool!
But what next?
Yep, that’s right, we need to decide how the screen is going to be set up – will it be hung, or will you build feet for it to stand in?
How to Set the Screen Up
Now that your frame and screen are built you will need to make a decision on how you are going to stand the outdoor movie screen.
You have two options here, you can either hang it on an existing wall, or perhaps a pergola, or you can create feet so that it’s able to freely stand in your backyard.
- Hanging the DIY movie projector screen
- Building a portable standalone freestanding DIY movie projector screen with feet
This choice really depends on the layout of your backyard, so I will leave it up to you as to which method you choose, but both are detailed below.
Method 1: Hanging the PVC & Sheet Movie Screen
Possibly the most simple method, but really depends on the layout of your backyard or garden.
Use the hanging method if you have a fence, pergola, or a similar structure that is large enough to take your new screen.
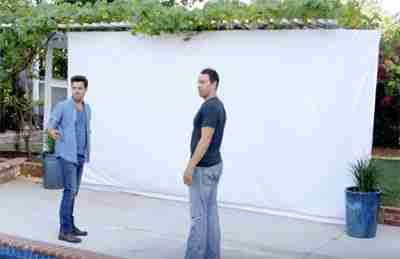
The first thing you will need to do here is screw hooks into the top piping of your PVC frame. Once those are in place, hold the entire screen up to where you want it to hang, you will need two people to do this.
 Once you’ve positioned it in place, you can then screw hoops screws into the structure where the screen is going to hang from – so this could be a fence, pergola, or similar.
You can see an image to the right of this guide taken from a YouTube video where some guys did something similar in their own backyard.
I would also recommend that you anchor the screen to the structure at the bottom – for this, you can use some kind of twine – it’s very similar to how a tent might be anchored – I will actually talk about this more in the next method – so scroll down to see how I do it.
Now I am going, to be honest, this isn’t my favored approach and I will tell you why.
When I build a DIY outdoor movie screen I want it to be portable and want to be able to take it to the homes of friends and family. Using the hanging method doesn’t let me do that, as I don’t want to be screwing hooks into my friend’s fences.
Instead, I prefer the ultimate in portability – which is building legs and feet for my PVC movie screen frame that I can take anywhere, at any time.
Keep reading on for method 2 so you can find out how to do that yourself.
Method 2: True Portability with Feet and Anchors
Hanging your movie screen is only going to be possible if you actually have somewhere to do so. Chances are that you don’t, so you will need to build feet and anchors for your DIY movie screen stand and frame. Here’s how you do it.
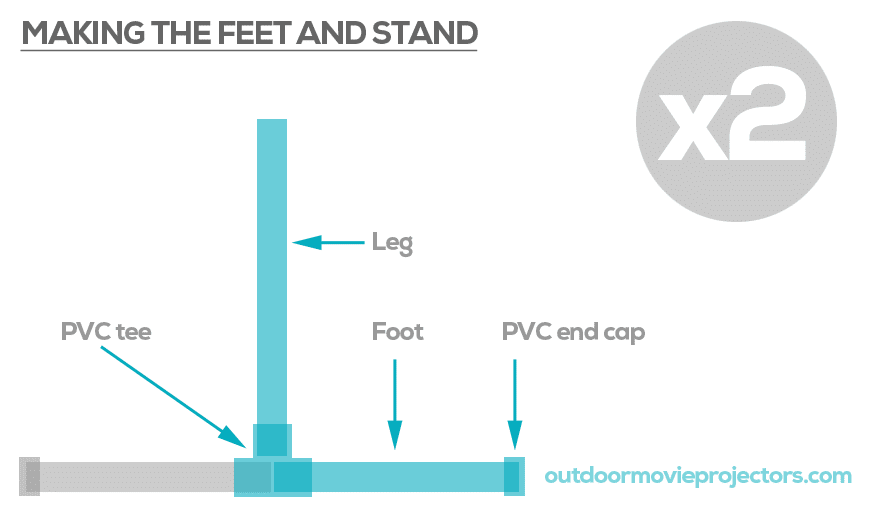
The stand is just two feet and a leg for each side, again made from PVC piping.
You make the feet about 18 inches wide, and the legs about 2 feet high. They are fitted together using PVC tees (view on Amazon) and then have end caps placed on the end of the feet sections.
You can see how those work in the diagram below.
Now you have two of these, you can then slot them into the piping in your frame.
But what if it’s windy?
Windy conditions can create havoc on your backyard movie night, so I advise creating the option to attach tie-downs and tethers to the sides of your frame.
It’s simple enough to do.
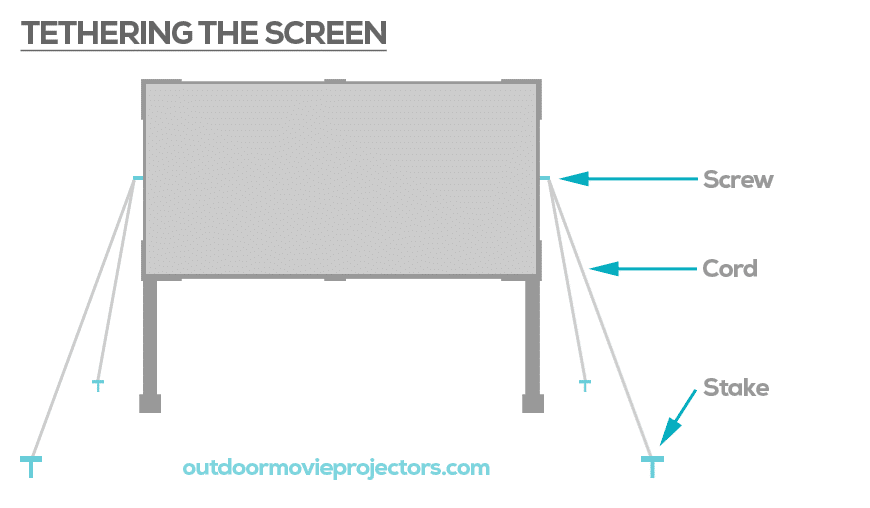
All you do is drill small holes about halfway up on either side of the frame side piping. Once you have the screws in place, put some tent stakes or tent pegs in the ground. I advise 2 stakes on each side, making 4 in total – so 2 at the front, 2 at the back.
You can then use paracord or twine to tie from your frame screws down the tent stakes.
It should look something like this:
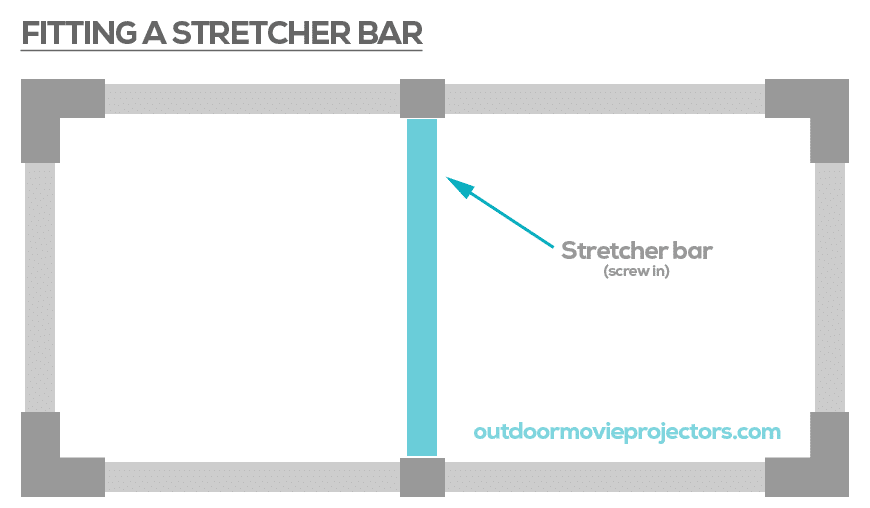
Creases in the Screen? Fit a Stretcher Bar
If your screen has any creases in it, then you can actually do an additional task that will help to stretch the material out – and that’s by fitting what I can a stretcher-bar into the middle of the frame.
Again, make the stretcher bar using PVC piping, and simply screw it midway behind the frame from top to bottom – you will need to make small cuts in the sleeves to screw through.
Final Thoughts & Recommended Gear
I hope that you have enjoyed this DIY guide on how to make an outdoor movie screen with PVC.
I would love to know how you got on!
If you are looking for other items to make your backyard movie night go without a hitch, then take a look at my recommended gear section which includes some recommendations on projectors as well as other items you might want to consider.


