
One of my favorite outdoor projectors is the Epson VS240. It’s a sturdy product, offers great value, and should last you for years to come.
But what happens when the lamp goes faulty?
Believe it or not, this does happen, despite the manufacturer stating that the lamps have a lifespan of around 5,000 hours.
Whilst this should mean 208 days of continuous use (that’s a lot of backyard movies), your Epson VS240 lamp might need replacing sooner.
So how do you do it?
Well firstly, and probably stating the obvious here, but you need to buy an Epson VS240 replacement bulb (view on Amazon). The bulbs and lamps come with the housing, hence the price which is pretty expensive, but hey, what can you do?
Once you have your replacement Epson VS240 bulb you are ready to fit and install it. This is how you do it.
Step 1: Turn Off the Projector and Unplug all Electrics
Before you do anything, turn the thing off! Unplug all power cords, isolate any electrics running to the product, and then let it sit idle for an hour as described in step 2 below.
Step 2: Let the Projector Cool Down for 1 Hour
If the bulb has just gone, don’t try to install a new bulb just yet. You should always let the Epson VS240 cool down before replacing the lamp and I would recommend for at least one hour.
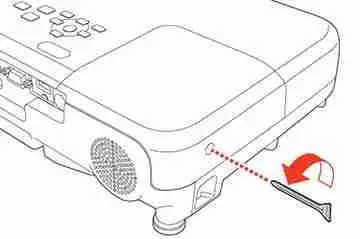
Step 3: Loosen the Lamp Cover
If you have bought an official Epson VS240 lamp or bulb replacement, then it should come with a screwdriver. Use this to loosen the screw securing the lamp cover.
If the bulb has broken then there might be loose glass inside of the projector, so be careful not to cut yourself.
If there is any broken glass, then gently shake it out onto paper, and then dispose of it carefully.
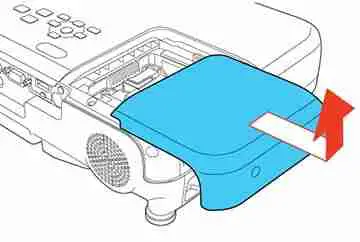
Step 4: Slide the Lamp Cover Out and Pull the Lamp Out
Carefully slide off the lamp cover and lift it off, again be careful to check for any broken components that might still be inside the projector.
Now loosen the screws which attach the bulb to the projector. They do not come out completely so only need loosening.

Once that’s done, take hold of the raised section of the lamp and pull it out, but do it carefully and slowly as to not damage any other components.

Step 5: Insert and Install the Replacement Lamp
Again, being very gentle, push the new lamp into your projector.
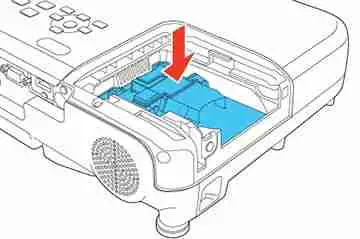
It’s quite a common mistake to insert it the wrong way, so if you feel any resistance, chances are you need to turn it around and make it face the correct direction.
Step 6: Tighten the Screws Back But Not Too Hard
Once the new lamp is pushed firmly in, you can tighten up the securing screws.

Don’t screw them too tight as this can lead to cracks and breaks in the housing of the lamp. Just screw them in until they feel firm; don’t over-tighten.
Step 7: Replace the Lamp Cover and Tighten Screws
Place the lamp cover back on and tighten up the screws.
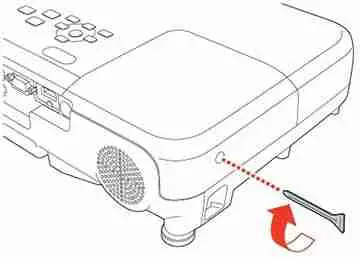
As before don’t over-tighten them.
If you don’t secure the cover enough, the lamp will switch back on, so do a quick test. If you don’t get any power to the lamp, you might need to tighten and secure the screws a little more.
Additional Tip: Don’t Touch the Glass
Whilst fitting a replacement bulb or lamp to the Epson VS240 is relatively easy, there is one rookie mistake you can make.
Whatever you do, don’t touch the glass on the lamp when fitting a new one.
There have been reports of this leading to the failure of the lamp, as they are quite sensitive.
Recycling Your Faulty or Damaged Lamp
The lamps that come with the Epson VS240 contain mercury. There is legislation from state to state as to how products containing mercury should be disposed of.
Please make sure that you adhere to the law and help to protect the environment.
You can visit the United States Environmental Protection Agency website to see what the laws are in your state on the link below:
https://www.epa.gov/hw/state-universal-waste-programs-united-states#links


